
Pagers were popular many years ago, and some people may still have one at home. Is it possible to test the pager now? Absolutely, and I will show you how to do it.
Let’s get started.
In the 90th I was a student and the pager for me was something like a Star Trek Communicator, a piece of the cutting edge technology. It is fun to remember it because now I know that technologically the paging protocol is very straightforward. From the encoding perspective, the pager is not so different from the wireless doorbells that are selling now for 5$ in Aliexpress.
Let’s say, we want to send a message “TEST” to the number “1234”. The message in a binary form will be looking something like this:
10101010101010101010101010101010 - Preamble
01111100110100100001010111011000 - Frame Synchronization Code
01111010100010011100000110010111 - Idle codeword
00000000000100110101111000111111 - Address + Function Bits + CRC
10010101101000111001001111111100 - T E S (7 bit/symbol)
11001010100000000000001111100011 - T . .
01111010100010011100000110010111 - Idle codeword
And this is how the message looks on the radio spectrum:
Bits are encoded with a frequency shift keying (FSK) modulation using 9 kHz bandwidth and 1200 bits per second speed, all this message is transmitting in about 0.5s.
Looks simple, and it really is. I will skip the details, those who are interested can read the protocol specification. It is even easy to draw all these bits with pen and paper — these protocols were simple in the past, I think nobody can do it with modern GSM or WiFi. In POCSAG messages there is no authentication, no security keys — all messages to all paging company customers are available on-air “as is”, and by the way, can be easily decoded with PC software like PDW.
How customers are receiving their messages? Every pager has its own unique ID, called CAP — Channel Access Protocol or RIC — Receiver Identification Code. All pagers from the paging provider are listening to the same frequency, let’s say, 164 MHz. If the message code is equal to the pager code, the pager saves the message and makes the loud “beep”. That’s it. It’s a one-way communication, there is no confirmation sending back, the pager has only the receiver and no transmitter at all. The logic and hardware are extremely simple, and because of that, the pager can work for more than a month from a single AAA battery. Interestingly, pagers are still in use in some countries even now — in the hospitals or emergency services, where it is important to have a portable and lightweight device with long battery life.
If you work as a firefighter or in the hospital, you will probably get a pager for free and you don’t need to read this article further. In many countries, paging providers are still available, so it is also possible to sign a contract and to get a new device, but let’s say, this is not a geeky way. I am talking from a perspective of a person who wants to test the pager because of self-educational or nostalgic wish, or maybe even still have the old one, made in 90th, at home. I have a piece of good news — with a high probability, it can be tested again and will be really working. Not on an all-city coverage scale, of course, but it’s possible to run your own low-power paging network at least inside your apartment.
It is possible to buy a new pager nowadays, but they are not cheap. This is the first link, I’ve found on Google:
It can be too expensive to buy just for fun, and even more, the pager should be configured before its use, and the programming tool and software for it, can also cost a lot. Another possibility is to buy a pager made in China, it is cheaper, with a programming cable the total cost is about 80$:
And finally, it is possible to buy a used pager on eBay for 20–50$. It is cheap, and it is the old “vintage” model, which is also fun. But before making a purchase, we should keep in mind two things, that were described before in the POCSAG section:
- To send a message to the pager, you need to know its frequency. For the old pagers, it is usually written on the backside of the pager. If you don’t know the frequency and you have no way to get it, the pager is useless.
- To send a message to a pager, you need to know its capcode. It’s a 7-digit number that looks like 0001234. If you don’t know it, you will need a programming cable to read the pager config.
Let’s consider a practical example. I saw this “Motorola Advisor Gold” pager on eBay (the seller name is hidden for privacy reasons):
The price is not so big, but the shipping cost to the EU is almost half the price of a pager. But ok, let’s check the next photo:
We can see the frequency (462.875 MHz) and the transmission speed, and it’s good to know it. But the last sticker with a capcode was removed by the owner, maybe for privacy reasons, and this is not good for us. It can be possible to read a capcode, but we need to buy or make a special programming cable and we also need to find the proper software. All this should be checked before the purchase, otherwise, we have a chance to get a “brick” that looks like a pager but does not work. And the last, optional, but important, check — we should verify if the desired frequency is available in our region. It can be done using a cheap RTL-SDR receiver, and software like HDSDR. If there is another signal on the same frequency, the pager will also not be working. In my area the 462.875 MHz frequency, listed on the backside of the pager, is already occupied, probably by a DAB+ or digital TV signal:
So, in my case, it was better to find another model on the market.
To send any data to the pager, we have to transmit the POCSAG message using the proper radio frequency. Before making any transmission, please check the local radio regulations. This article is describing only the technical possibility but not the legal side, in different countries the rules may vary. For example, in the US according to Part 15 of the FCC rules, extremely low powered devices do not require licensing if the emitting energy is not more than 200 microvolts at a 3 meters distance. That can provide up to 30 meters range that is absolutely enough for any research or educational experiments. In other countries, the regulations may be different.
There are 3 easy ways to transmit POCSAG messages.
Rpitx
The easiest way is to use the Raspberry Pi, and surprisingly, it’s completely free: with the help of free and open-source software rpitx, the signal can be generated directly from the Raspberry Pi pin. It is enough to put a short piece of wire on the GPIO4 pin:
The pager is sensitive enough to get such a signal with a several meters coverage. On the same subject : Tackling Trunked Radio With Software.
To send a message we need to install the rpitx software and run the command:
echo -e "1000001:MESSAGE TEST" | sudo ./pocsag -f "465198000" -b 0
Here the 1000001 is a capcode, 465198000 is the frequency and 0 is a message type (the message can be one of 4 types, for example, 0 — numeric only, 3—alpha-numeric). Other parameters, like signal inversion or baud rate, can also be changed if needed.
The output power is definitely low, but it is enough to test a pager within the apartment. The rpitx application works surprisingly good for its price (that is, let’s say again, is zero), but of course, the Raspberry Pi is, in general, not a precise RF generator. The frequency may be not 100% correct and a small adjustment of the value within several kilohertz range may require (it is also nice to have an RTL-SDR as a control receiver).

MMDVM Board
The next way is to buy a special MMDVM (Multi-Mode Digital Voice Modem) shield, that can be attached to the Raspberry Pi: Read also : 2020 In Review: Software Defined Radios Impact on Warfighter Agility.
This shield contains the ADF7021 transmitter with an 80–940 MHz possible frequencies range and a small antenna. Despite the name, the MMDVM shield can transmit not only voice but the POCSAG messages as well. To use the board, we need to install the MMDVMHost app and configure the MMDVM.ini file (set the desired frequency and enable “POCSAG” and “Remote Control” modules). After that, we can run the MMDVMHost app (it can be placed at the /etc/rc.local for autostart or run as a service if needed). In another terminal window we can use this command to send a message:
./RemoteCommand 7642 page 1000001 "MESSAGE TEST"
Here the 7642 is the remote control port, 1000001 is a capcode.
Using the MMDVMHost is a bit more complicated and requires some Linux knowledge, but the output signal is better compared to using the Raspberry Pi pin as an output.

GNU Radio
For people who don’t have a Raspberry Pi, but having the LimeSDR, HackRF, USRP or any other SDR transceiver, it is possible to send POCSAG messages using GNU Radio. On the same subject : G/ATOR undergoes interoperability tests – Digital Battlespace.
There are several POCSAG encoders, I’ve found the gr-pocsag module from ON1ARF the easiest to use, it even does not require installation and can be used from any folder.
Describing the GNU Radio blocks is far out of the scope of this article, those who wish can check the gr-pocsag page on their own.
All these described solutions are low-power. Those who want more range can use a dedicated radio transmitter, like Motorola GM-350, that can provide several kilometres range, but for this type of transmission, a valid license will be obviously required.
If you know the pager frequency and capcode then you can skip this part. On the other side, programming the pager can give you a “flavour” of that time, and in general, it’s more flexible to have the possibility to change the pager settings.
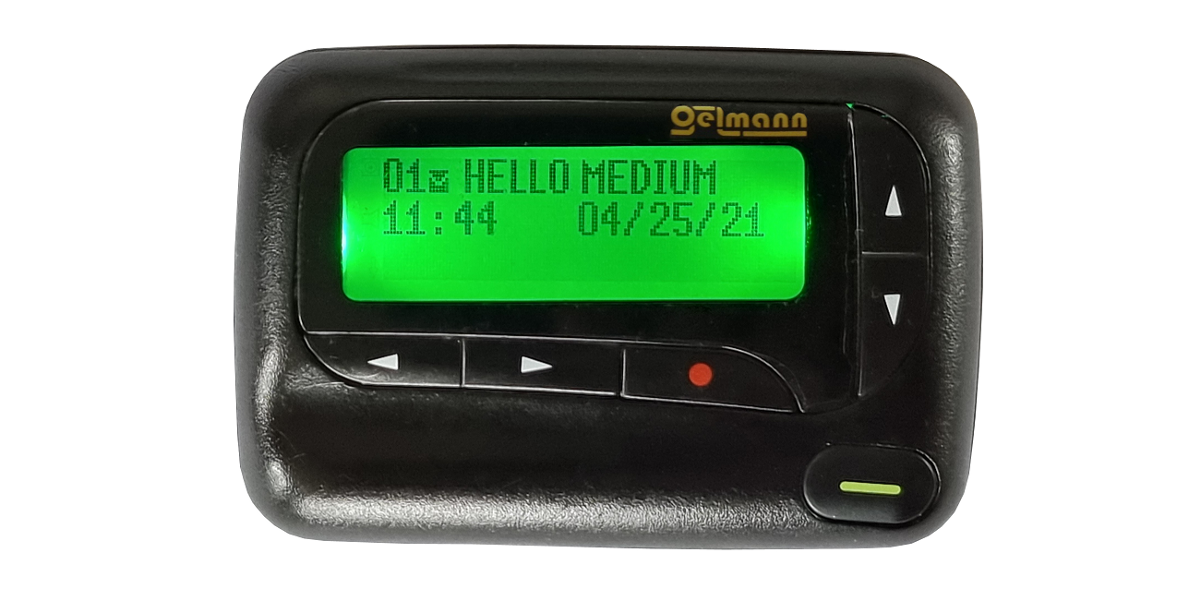
Alas, there is no general rule of how to configure the pager. For some pager models, like Oelmann, the programming station and software can cost more than a pager itself:
Other models, like Alphapoc, can be configured manually, even without software, or using a relatively cheap USB programming tool. Old Motorola Advisor pagers, made in 1990th, have 3 pins for the serial port (USB-Serial can be used):
The software for these pagers requires an MS-DOS environment but can be run using the DOSBox. Newer (about 1997) Motorola Advisor Gold pagers having 2 pins interface. I’ve found this connection diagram online but did not check it myself:
Motorola pagers require old software, made for MS-DOS, it can be found online. Alas, many pages and links, created 20 years ago, are now not available — a well known “link rot” problem occurs when it’s going about things made 20 years ago. Another problem that can arise — many paging operators were using a password to prevent changing the pager config. It was maybe done for security reasons — after changing the capcope the pager owner can read messages intended for another customer. If the pager config is password-protected, the prompt will appear when reading the settings:
It is possible to read this password from the pager EEPROM by using 3rd party tools made by enthusiasts, but it will require some soldering skills.
It was fun to test the paging and to investigate how it works.
It is also interesting to mention, that vintage devices are fun to test, and they at the first glance, look cheaper. But in reality, they are not. For different tests, I bought 3 pagers, each one costs 20–30$. But the first pager had an incompatible frequency, the second one came password-protected and I cannot change its settings, the 3rd one is working. In total, I spend money, enough to buy a new one instead of 3 used ones. There is also obviously no guarantee when you buy 20 years old stuff — even if the seller writes “tested” in the description, maximum what he/she did, is putting the battery and checking the on-screen logo. I don’t expect sellers to know about frequencies or capcodes. But in my case, it was done for fun and self-education, so there is no problem with that, even if something does not work.
Another issue I run into while testing the pagers is the “link rot” problem. All people used to think that “Google knows everything” and “the information on the Internet is free”, but it is actually not. File storage and site hosting cost money, after some time webpages are becoming unavailable. Many old forum posts have dead links and contain empty squares instead of images. When trying to find information about the old stuff, all this became obvious. I was able to find useful software on some old and abandoned web pages but there is no guarantee that these links will be alive for a long time. There can be also legal reasons as well, for example, I am not sure that Motorola officially allowed somebody to publish their pagers programming software, even if it was made 25 years ago. But for keeping the technical heritage it can be important to save stuff like this, otherwise, we will not be able to show our grandchildren how old tech works, even in the museum.
As a final conclusion, pagers can be tested, and it is fun to do it. For those who want to make more tests on a larger scale, it is also possible to use POCSAG on the ham radio frequencies and to join the ham radio DAPNET (Decentralized Amateur Paging Network) network. This will require a ham radio license but for those who are interested in digital communications, it can be worthy to get it.
I wish all readers good luck and interesting experiments.
Comments are closed.