
The Raspberry Pi SDR add-on is not a new idea, but an open source one The cariboulite project looks like a great entry into the field. Even if you are not interested in radio, you may find the use of a special high-bandwidth memory interface for Pi interesting.
The interface in question is the poorly documented SMI or Secondary Memory Interface. [Caribou Labs] helpfully provides links to others who did the work to understand the interface together with code and a White paper. The result? Depending on the Pi, the SDR can exchange data of up to 500 Mbps with the processor. The SDR actually uses less than that, with about 128 Mbps. However, it would be difficult to transmit so much data by conventional means.
On the radio side, the SDR covers 389.5 to 510 MHz and 779 to 1,020 MHz. There is also a wide tuning channel from 30 MHz to 6 GHz, with some exceptions. The board can transmit at about 14 dBm, depending on the frequency and the value of the received noise is below 4.5 dB for the lower frequency bands and less than 8 dB above 3,500 MHz. Of course, some Pis already have radio, but not with this kind of opportunity. We have also seen the SMI drive many LEDs.

Although it is fashionable at the moment to name sophisticated new Tesla technologies, the real inventor had many creations of his own that would come to carry his namesake, including Tesla coils, Tesla oscillators, Tesla turbines and even the infamous Tesla Tower. One of his lesser known inventions is the Tesla valve, a non-return valve that allows movement in one direction without moving parts, and [Huygens Optics] shows us a method for etching small versions of these valves in glass.
Construction begins with a rather long warning, which is standard practice when working with hydrofloric acid. The acid is needed for actual etching, but this is much more complicated than typical etching due to the small size of Tesla’s valves. It starts with mixing buffered oxide, a mixture of hydrochloric acid, ammonia and hydrochloric acid, which gives a much more even etching than each individual acid alone. Like PCB etchings, a protective mask is needed to ensure that etching occurs only where it is needed. There are several possibilities for this, each with its advantages and disadvantages, but in the end [Huygens Optics] ends with one of the smallest Tesla valves ever produced.
In fact, the valves are so small that they can only be seen with a microscope. As he looked at them under a microscope, he was able to test with a small drop of water to confirm that they were working as intended. And while the valves he creates in this design are designed to work on liquids, [Huygens Optics] notes that the reason they made them so small was make small optical components with which they are known.
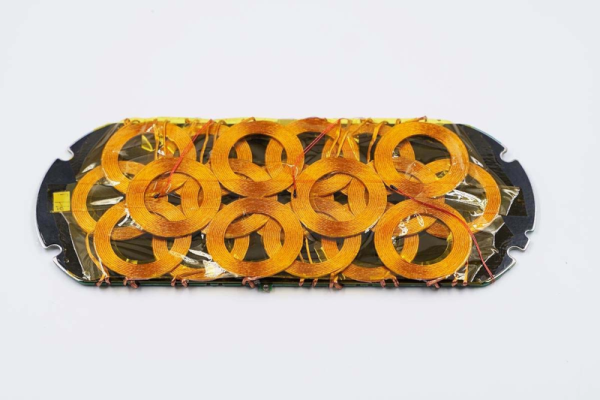
Wireless charging is conceptually simple. Two coils form until then transformer with primary in the charger and secondary in the charger. However, if you’ve ever had a wireless charger, you know that the reality can be a little more challenging, as the device has to be positioned exactly like that on the charger. Xiaomi has a multi-coil charger that can charge multiple devices and is tolerant of positioning them on the charger. How it works? [Charger Lab] tears one and finds 19 coils and lots of heat control crammed into the device.
The first part of the publication is a brief user overview of the device, looking at its size and features. But the second part is when the cover comes off. The graphite heat shield definitely looks like an accidental spill of something, but we’re sure it looks exactly like that. The coils are tightly packed in three layers. We have to wonder about their interactions and assume that only some of them are active at any given time. Tearing shows many of the components and even retrieves data tables for many components, but does not actually go into the theory of operation.
And yet this is an unusual device that can be seen from the inside. It’s impressive to see so much power and heat control in such a small package. We are surprised that we no longer see wireless charging in DIY projects. We see some, of course. Not to mention grafting a charging receiver to an existing mobile phone.

Let’s face it – eating different colored candies like M & Ms or Skittles is just a little more fun if you sort your pile by color first. The fun part is to do it by hand. [Jackofalltrades_] decided to deal with this time-worn engineering class problem because it is great and meets the requirements of the project for detection, activation and autonomous sequencing. We would dare to assume that it satisfies [Jackofalltrades_]”need chocolate too.
Here’s how it works: M&M is selected one at a time, drawn into a dark color inspection chamber, and then distributed into the correct cube based on the result. [Jackofalltrades_] completed their handle and built a color recognition setting from an RGB LED and a light-dependent resistor. The RGB LED glows red, then green, then blue at full brightness and reads voltage from the photocell to understand the color of the candy. In the beginning, the machine needs one color to read and store as references. He can then sort the entire bag by comparing each M&M with the reference values and updating them with each new M&M to create something like a moving average.
We love the beautiful and compact design of this machine, which is designed to maximize the 3D printer as one of the few tools available. The mechanical design is particularly elegant. He skillfully uses a stepper drive and only needs one part to perform most of the whole isolation process of each, transferring it to the dark color check chamber and then distributing it to the right side of the jar below. . Be sure to check out the demo after the break.
Need a next level sorting device? Here’s one that locates and separates the holy grail of candy-coated chocolate – peanut M&M that have not received peanuts.
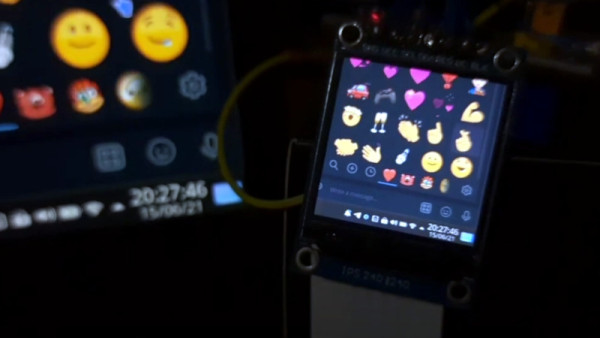
So far, most Hackaday readers are likely to be used for USB display adapters, in their most common form, directing DisplayPort through the ubiquitous serial interface. Connecting to projectors and other laptop screens is a breeze, and the days of “Will my laptop work on the spot” for people giving presentations are gone. [Avra Mitra]’s STM32 miniature monitor it may not ascend to these staggering heights, but at least it meets the promise of desktop playback on a small color LCD plugged through a USB port.
Not through any DisplayPort wizard, it instead relies on a Python script that takes sequential screen grabs and transmits them via USB to the microcontroller, which puts them on the display in tun. It is said to achieve 6 to 7 frames per second, as you can see in the video below, with the recognition that there is a huge room for improvement.
Despite its limited usefulness at the moment, we can see that perhaps this idea could be used in a very basic display after a few improvements. Meanwhile, more conventional monitors are following the established path of pairing a special control board with an LCD panel.
Comments are closed.